如何在樹莓派4上使用兆鎂新相機
本文僅適用於 樹莓派4 上的 32 位元 Raspbian。
基本步驟
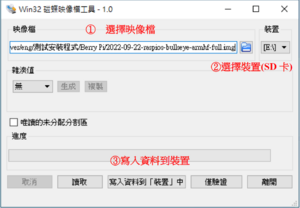
下載映像檔並安裝標準 32 位元 Raspbian,可以利用樹梅派官網提供的燒錄軟體或是 Win32 Disk Imager win32diskimager-1.0.0-install.exe 將映像檔案燒入至SD 卡中。
可使用以下命令更新系統。
sudo apt update
sudo apt upgrade
sudo apt autoremove
安裝檔案
Tiscamera:
從The Image Source 首頁 -> 支援 ->下載:
GStreamer 外掛程式 -> tiscamera Linux 32 Bit Camera Library for ARMHF Architecture
現在 USB 和 GigE 相機可以與 tcam-capture 一起使用。 也可以進行Python編程。
最佳化:
安裝 GStreamer 插件 -> tcamdutils 32 Bit for Raspberry PI OS
這安裝了更快的去拜耳處理、色調映射和更多屬性。
MIPI 相機:
GStreamer 外掛程式 -> Raspberry PI GStreamer Source for The Imaging Source MIPI Cameras
可利用下列命令安裝後,請關機後再連接相機。
cd /home/pi/Downloads #請至存放檔案之路徑
sudo apt install ./tiscamera_1.1.0.4139_armhf_pi4_raspbian_10 .deb #選擇安裝的檔案
sudo apt install ./tcamdutils_1.0.0.560_armhf_pi4.deb #選擇安裝的檔案
sudo apt install ./tcampimipisrc_1.3.0.662_armhf.deb #選擇安裝的檔案
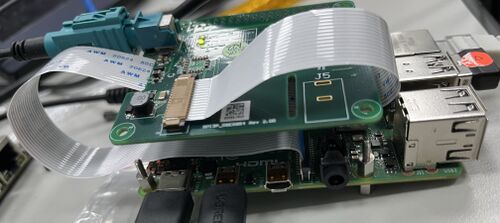
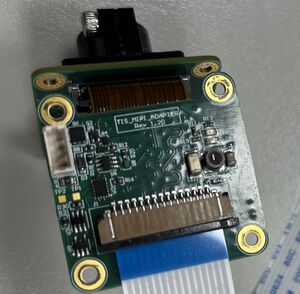
下圖為使用FPD-Link相機模組與連接MIPI相機之範例。
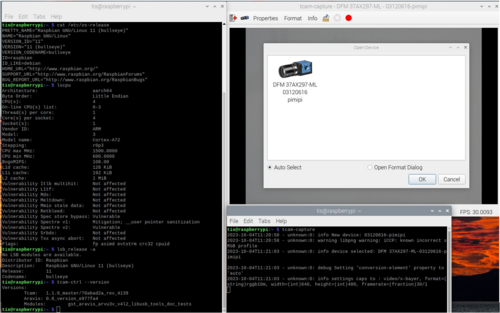
選擇裝置並確認相機可使用。
tcam-capture
C++程式設計:
開發安裝包可以從The Image Source Github中下載: https://github.com/TheImagingSource/tiscamera/releases/tag/v-tiscamera-1.1.1
重置SD卡:
若需要重置SD卡,可用此方法。

用系統管理員身分開啟命令提示字元。
diskpart
list disk
select disk x #選擇您的SD 卡磁碟
Clean
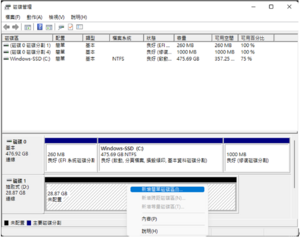
進入到 裝置管理員 → 磁碟管理 → 新增簡單磁碟區,完成後確認SD卡是否完整合併。
如有任何疑問,請隨時透過 The Imaging Source - 聯絡表單與我們聯繫。