使用 IC Imaging Control 4 SDK 進行 QT 開發
跳至導覽
跳至搜尋
本文使用IC Imaging Control 4,此僅支援Windows 10 以上版本
範例可透過連結下載: https://github.com/TheImagingSource/ic4-examples/tree/master/cpp/qt6
IC Imaging Control 4 C++文件可參考連結: https://www.theimagingsource.com/en-us/documentation/ic4cpp/namespaceic4.html
- 安裝IC Imaging Control 4 SDK 請至連結下載並安裝SDK:https://www.theimagingsource.com/zh-hant-tw/support/download/icimagingcontrol4win-1.0.0.2416/
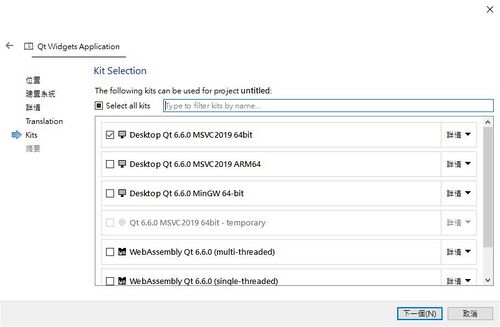
- 新增專案並選擇 CMake建置,編譯器 MSVC2019 64bit
- 在CMakeList裡,加入尋找和設定IC4程式庫 *請更改為你的msvc2019_64路徑
find_package(ic4 REQUIRED)
list(APPEND CMAKE_PREFIX_PATH "E:/QT/6.6.0/msvc2019_64/")
- 在CMakeList裡, target_link_libraries連結IC4程式庫
ic4::core
- 將 <ic4/ic4.h> 引入標頭檔
#include <ic4/ic4.h>
- 初始化IC4程式庫
ic4::InitLibraryConfig conf = {};
ic4::initLibrary(conf);
- 加入qt6-dialogs。範例中提供DeviceSelectionDialog以及PropertyDialog,可以將此資料夾複製並加入專案中。 在專案裡右鍵 -> Add Existing Ditectory -> 勾選qt6-dialogs資料夾
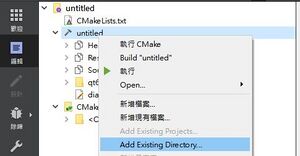
#include "qt6-dialogs/PropertyDialog.h"
#include "qt6-dialogs/DeviceSelectionDialog.h"

